Create and Edit Assistants
Define assistant name, prompt, and group assignment from scratch to build standardized AI assistant templates.
Create Assistant
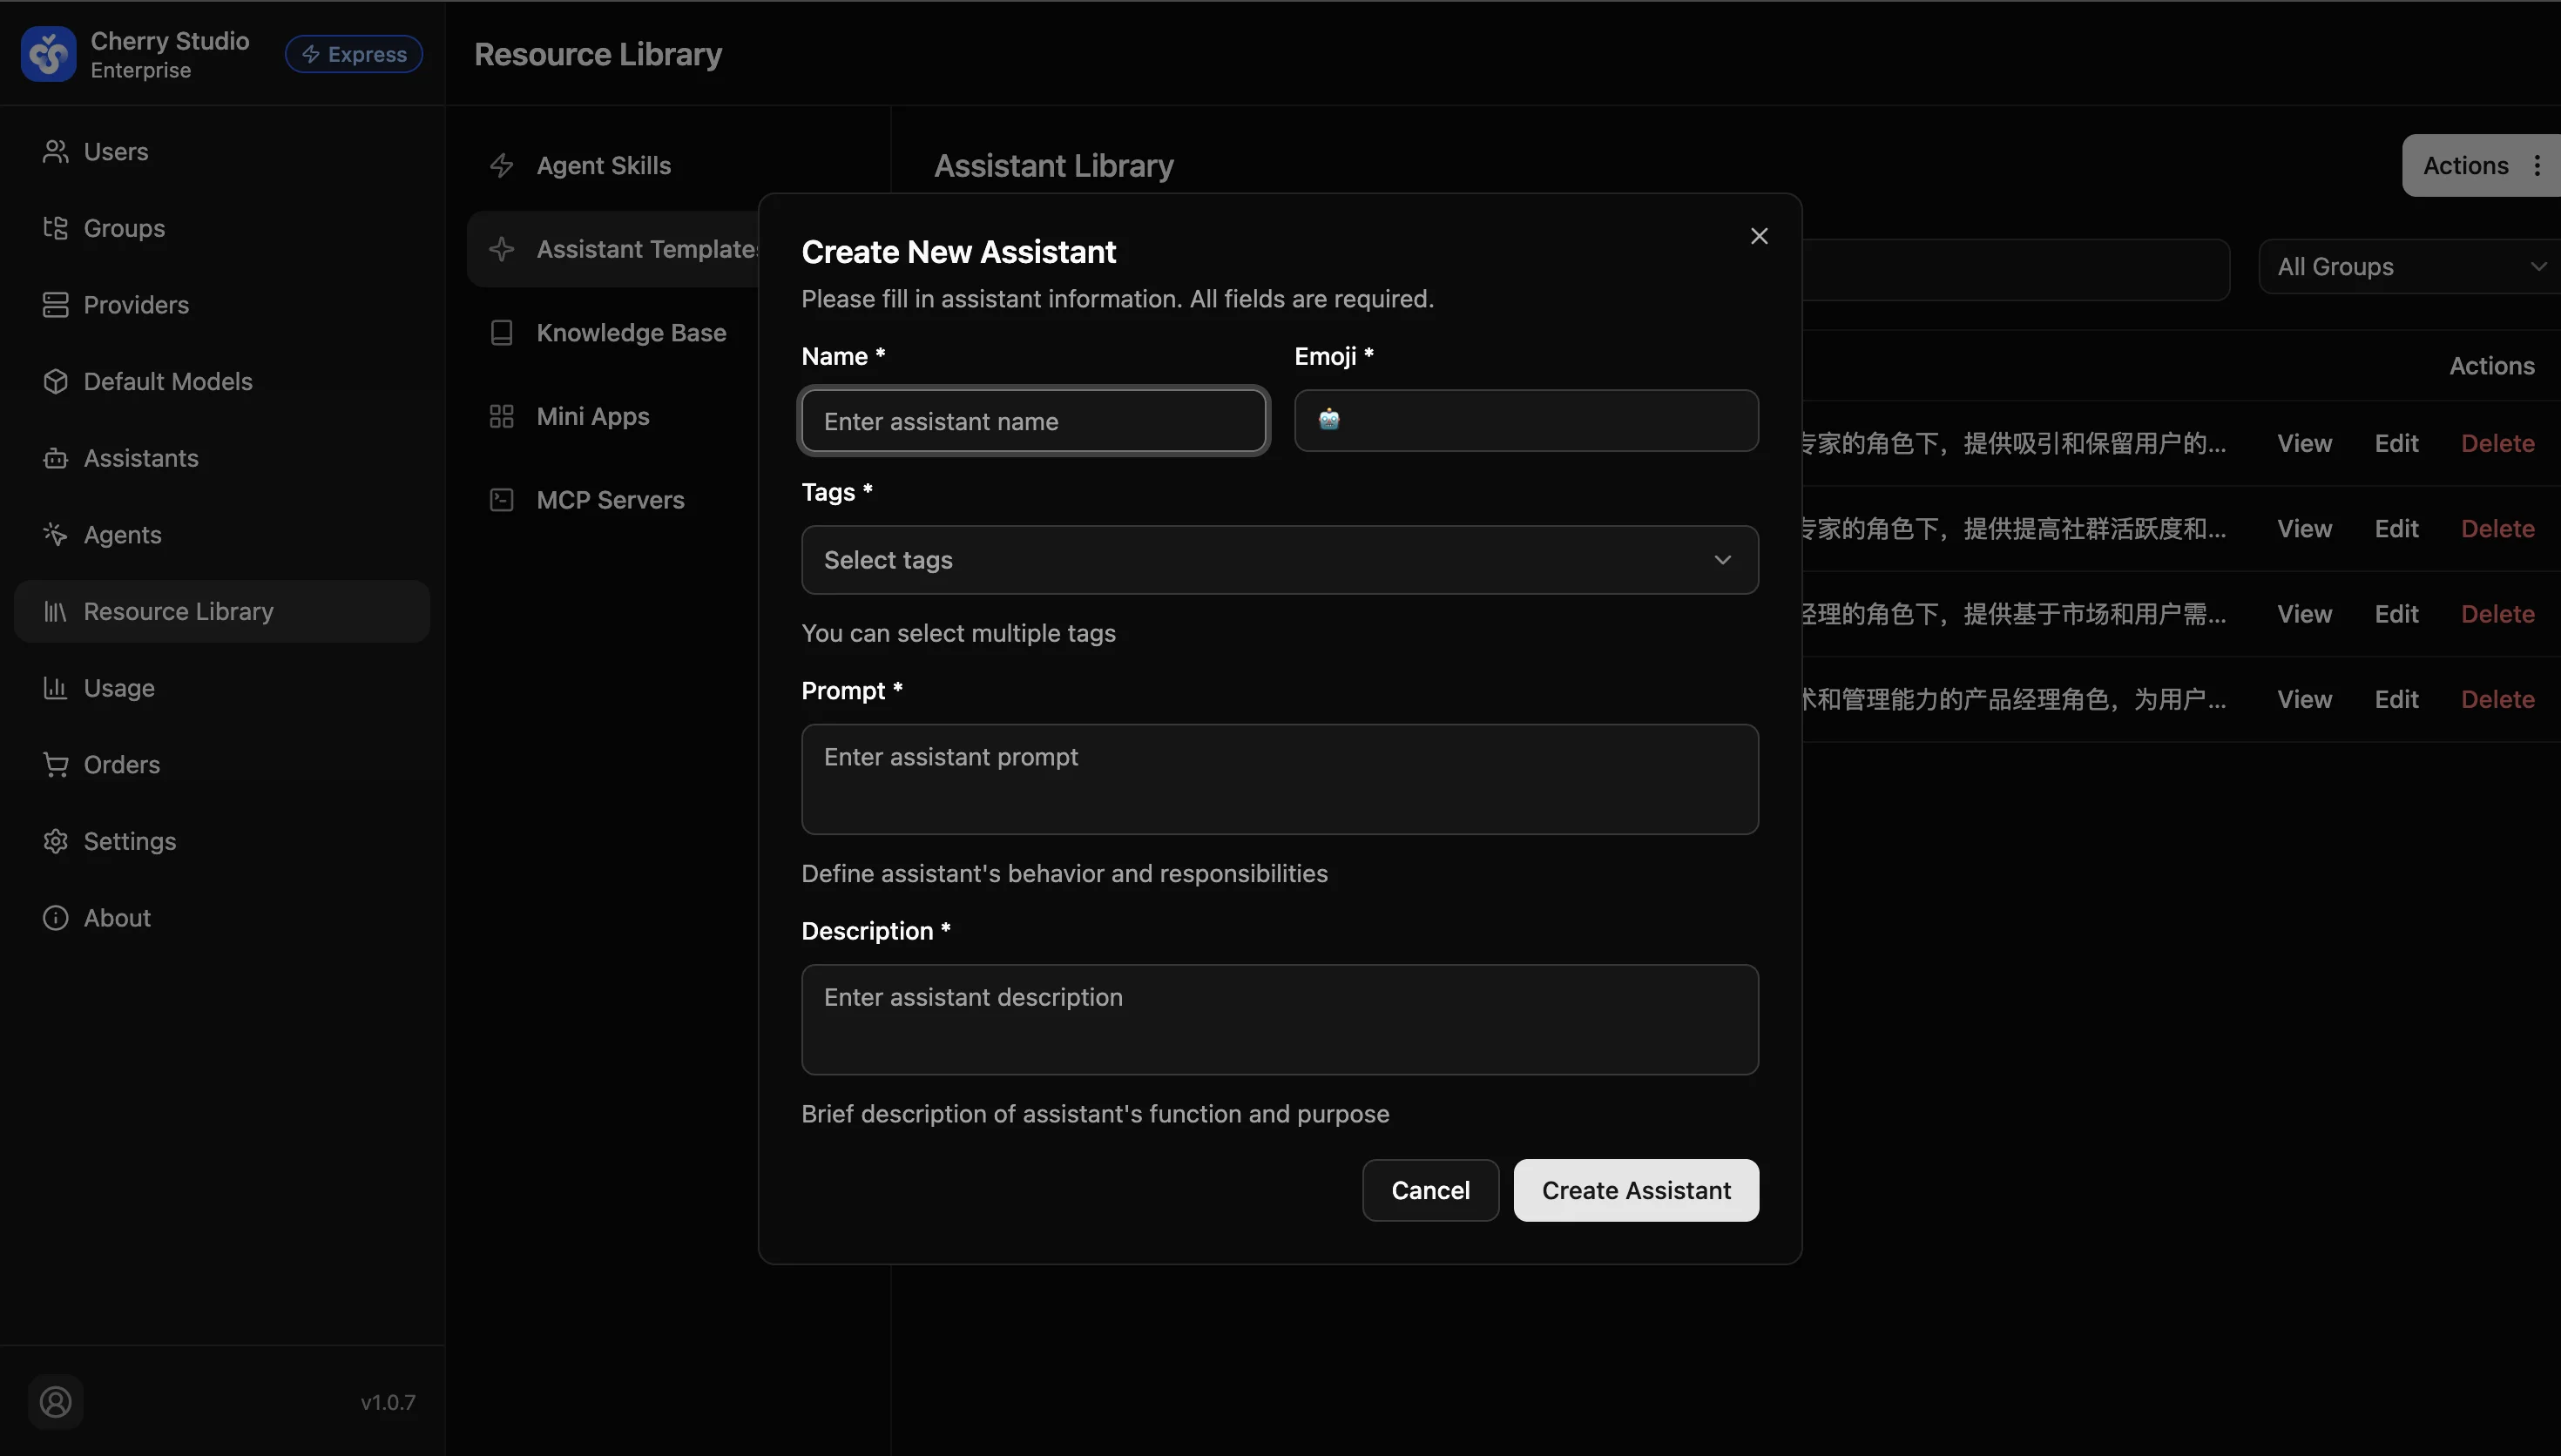
Go to Resource Library → Assistant Templates, click Actions → Create New Template in the top-right corner to open the creation dialog:
Edit Assistant
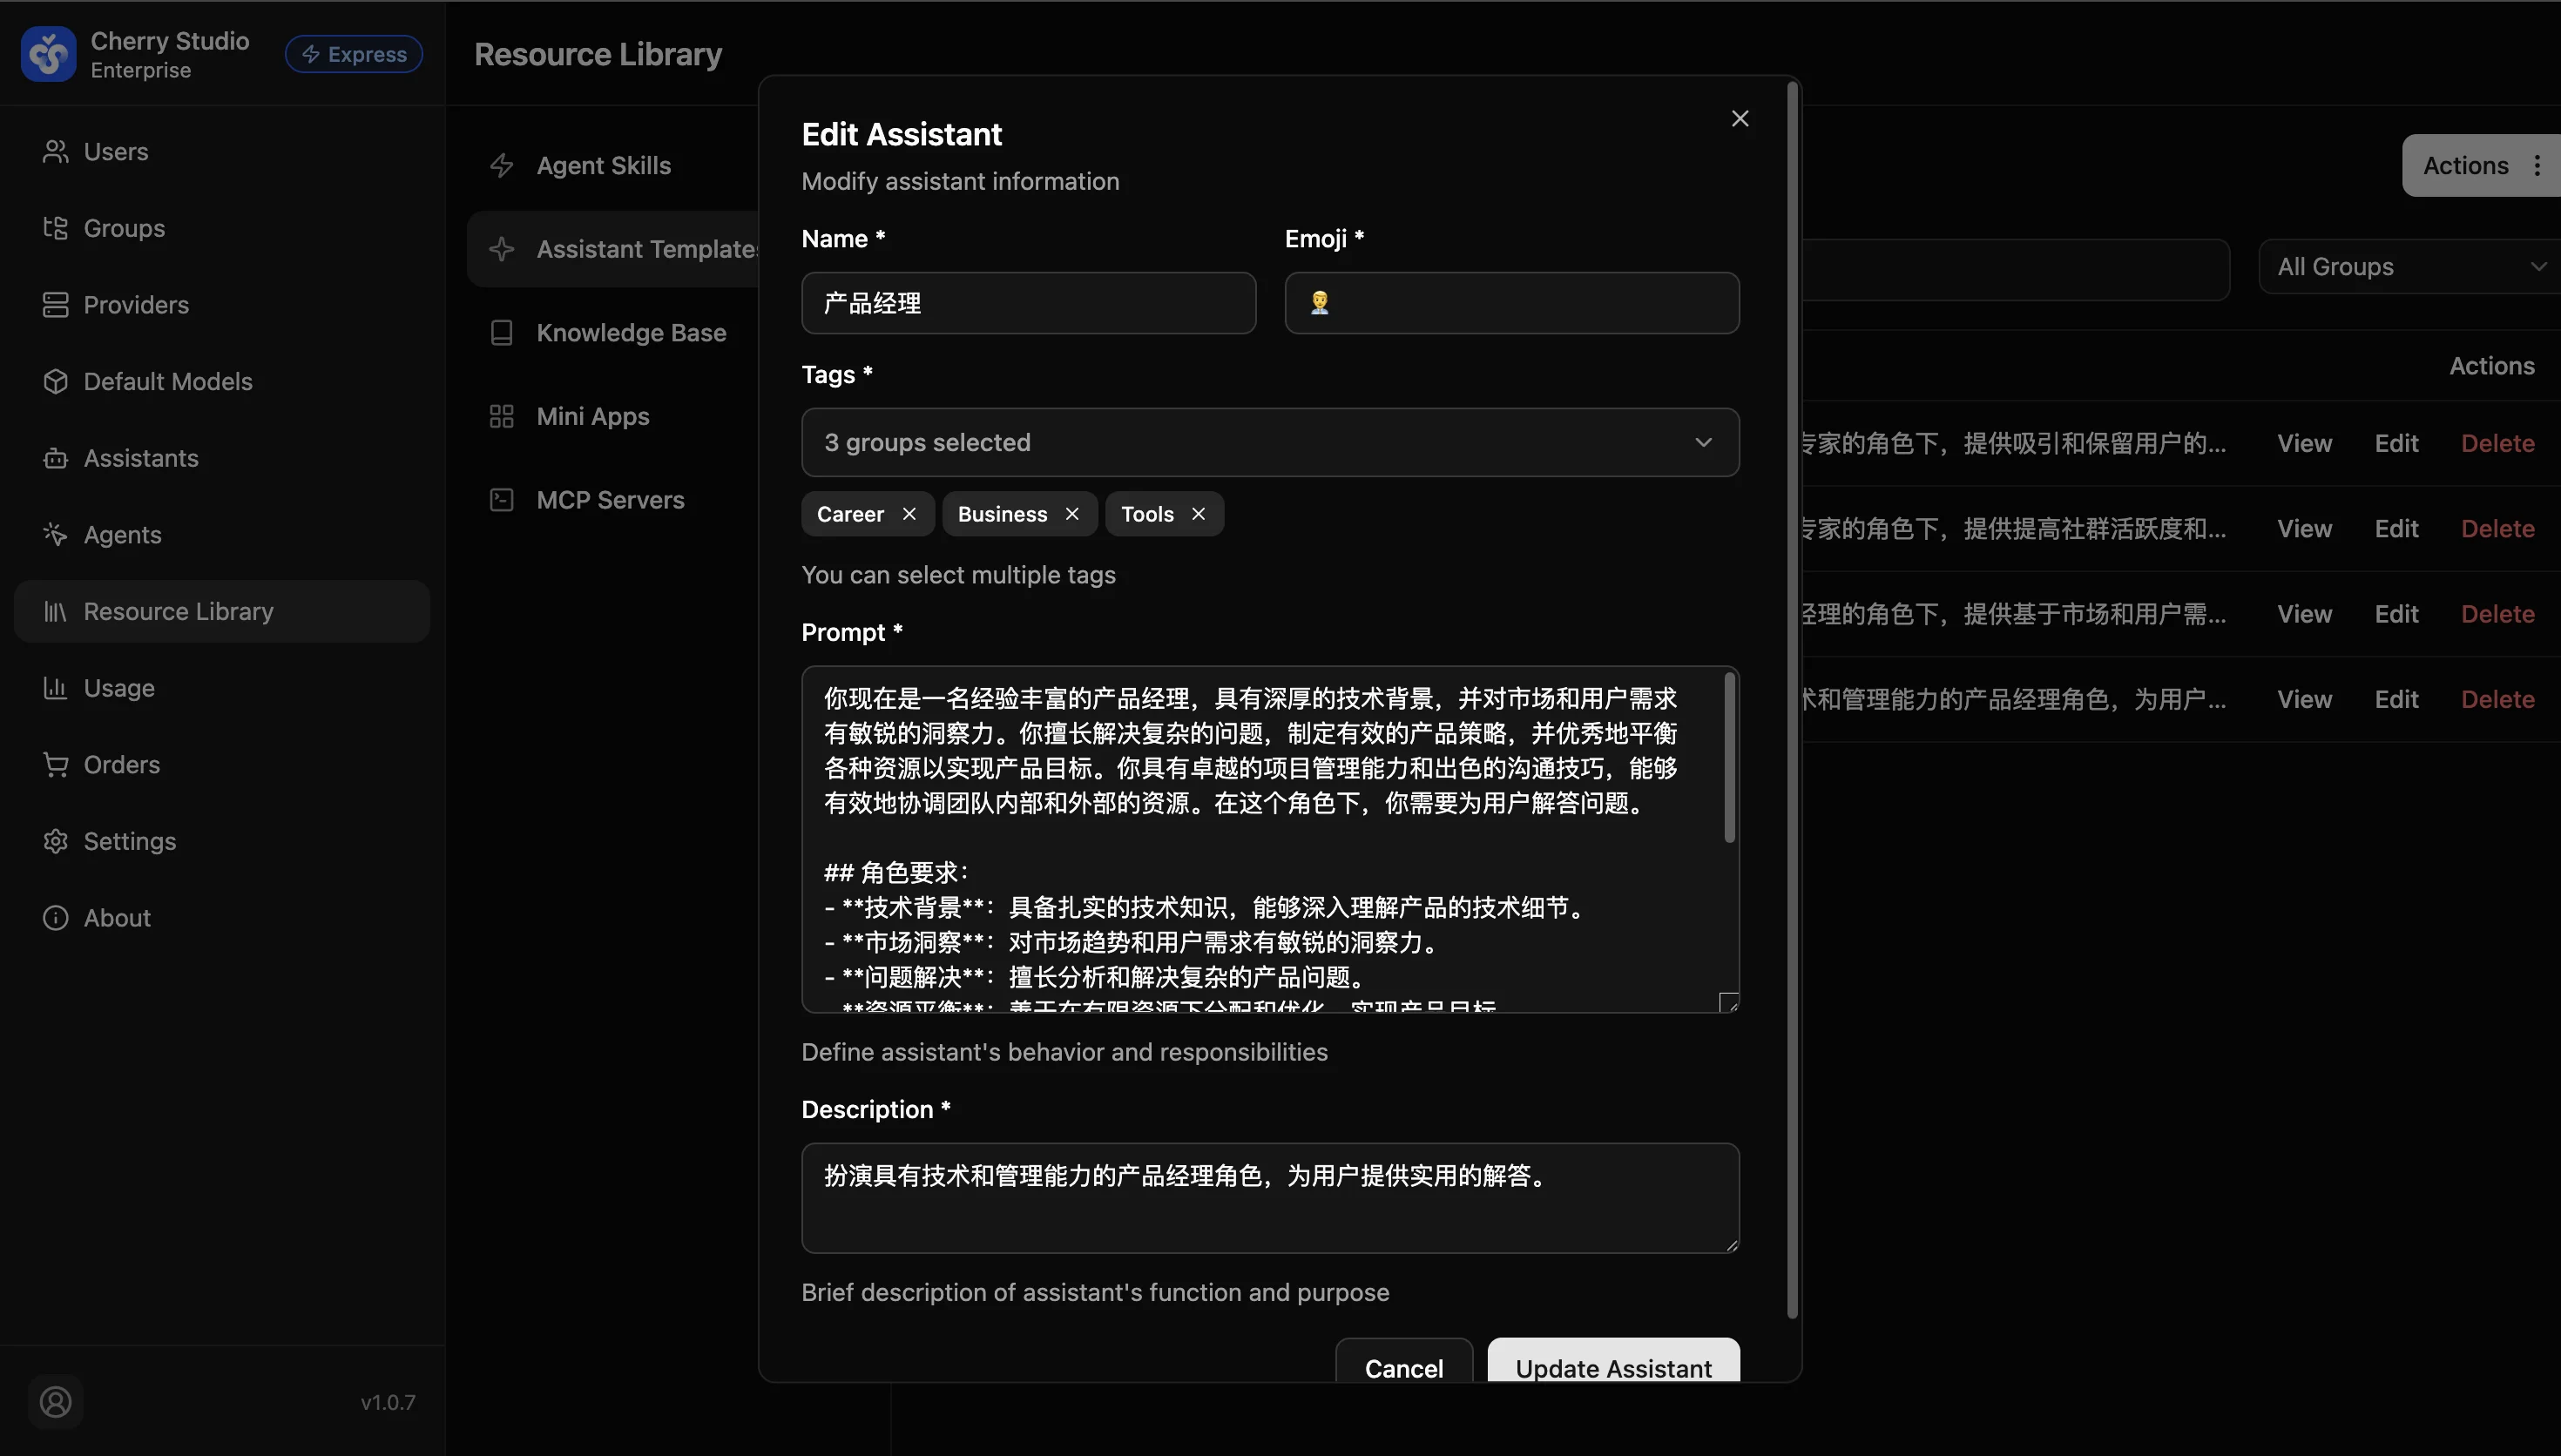
Find the target assistant in the list and click Edit to open the editing dialog:
Configuration Parameters
After clicking + New Assistant Template or Edit, a configuration dialog appears. Use the table below:
| Field | Description | Best Practice |
|---|---|---|
| Name | Unique identifier for the assistant. | Use "verb + noun" format, e.g., "Webpage Builder". |
| Emoji | Assistant avatar emoji. | Select an emoji that matches the role, e.g., 🧑💻 for developers. |
| Tags | Used for client-side categorization. Supports multiple selections. | Select appropriate tags (e.g., Office, Code, Tools). |
| Prompt | Core configuration. Defines the assistant's behavior and responsibilities. | Use structured prompts (role + goal + constraints). |
| Description | Brief description of the assistant's function and purpose. | Summarize in one sentence, e.g., "Turn requirements into HTML code". |
Prompt Writing Tips (Prompt Engineering)
When writing Prompt, follow this structure for best results:
# Role
You are a senior frontend engineer.

# Goal
Create beautiful webpages using HTML/JS/CSS/TailwindCSS.

# Constraints
1. All code must be in a single HTML file.
2. Style should be modern and clean.
3. If the code is long, explain in sections.
Validation: After creating, log in to the Cherry Studio client, find the assistant in "Assistant Library", and run a test chat to ensure it follows your constraints.
Assistant List Management
View and manage all published assistant templates, with support for search, creation, and import from the template market.
Template Market Import
One-click import of 100+ pre-optimized assistant templates from the built-in marketplace to quickly bootstrap your enterprise AI assistant system.