Create and Edit Groups
Create new business groups and configure basic info like name and description to map your organization structure.
Prerequisites
- You must have Admin privileges in the Cherry Studio Enterprise console.
- Configure available models in Model Management (API Key and Base URL validated).
Create a New Group
- Sign in to the Cherry Studio Enterprise admin console.
- Navigate to Group Management.
- Click + Add Group in the top-right.
- In the modal, fill in the basic information:
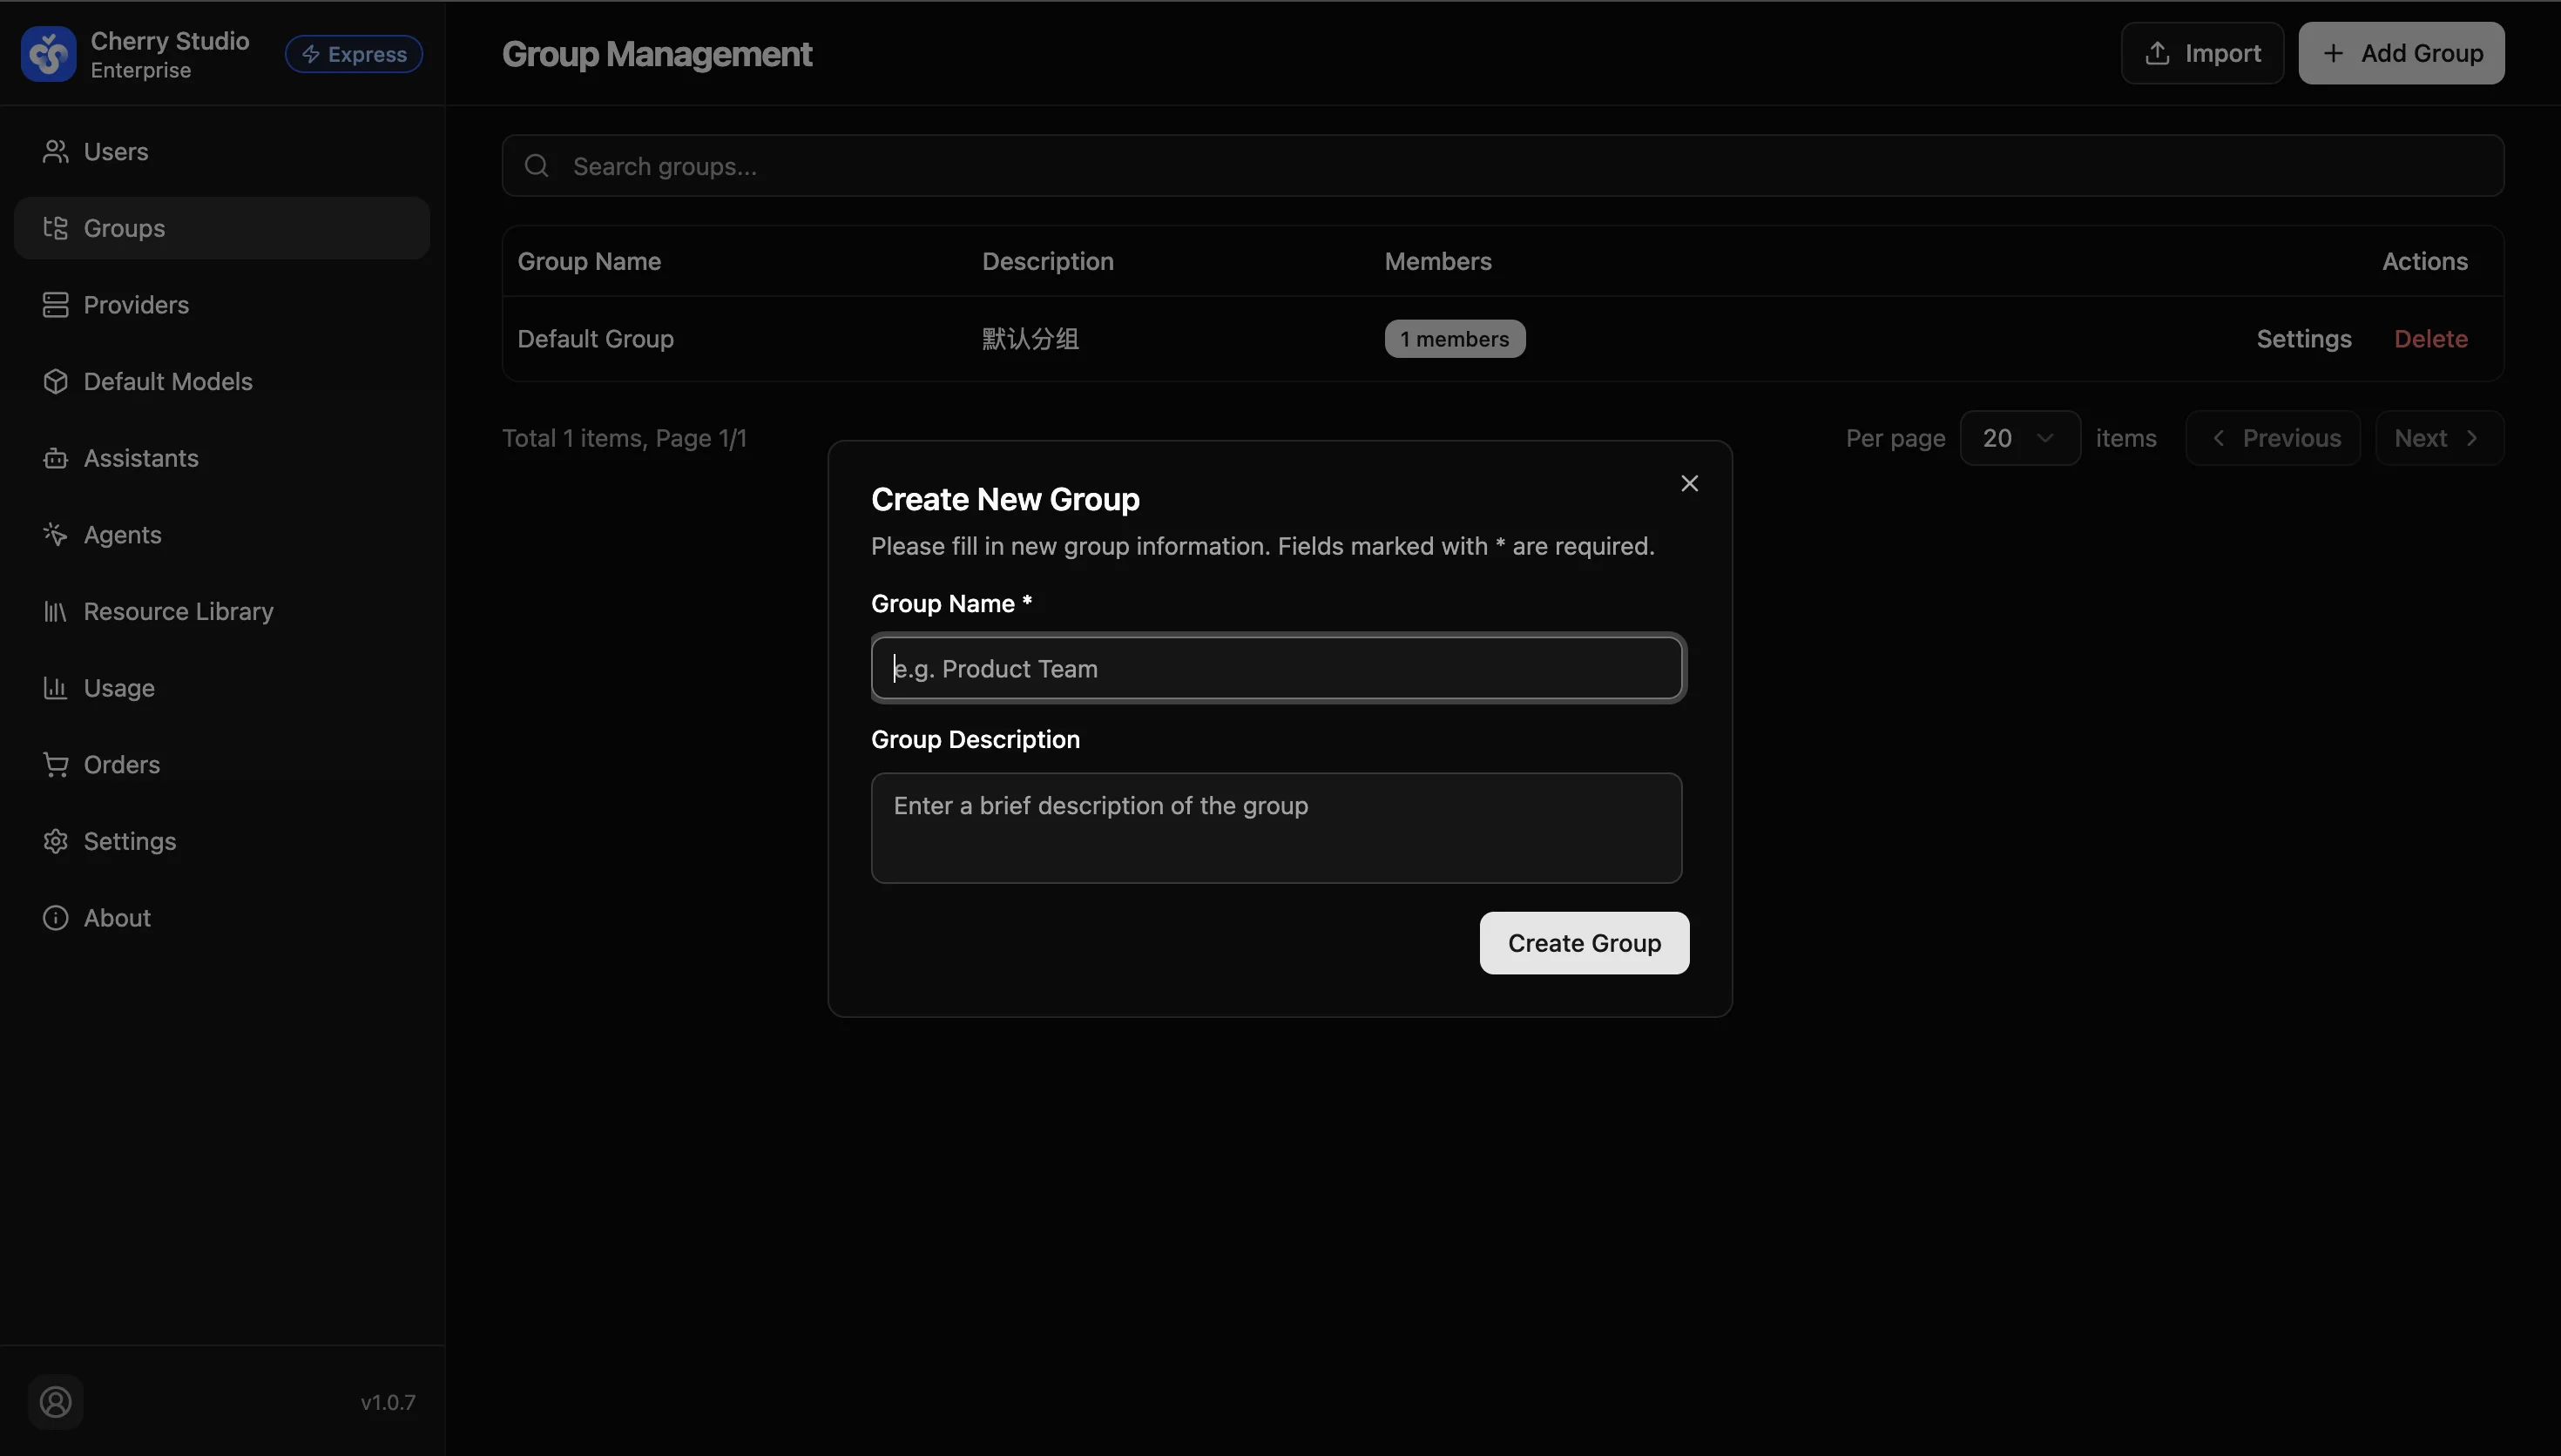
| Field | Required | Description | Example |
|---|---|---|---|
| Group name | Yes | Unique identifier; recommended format: "Department-Function". | R&D-Backend |
| Group description | No | Notes about group scope or resource limits. | Can use all coding models |
- After completing resource configuration (see next section), click Save.
Success: The new group appears in the list immediately, with Members showing 0.
Edit and Manage
When business needs change (e.g., temporarily add model access), you can edit the group anytime.
- Find the target group in the list.
- Click the Settings button on the right.
- Modify settings and click Save.
For detailed configuration, see Resource Permissions Configuration.
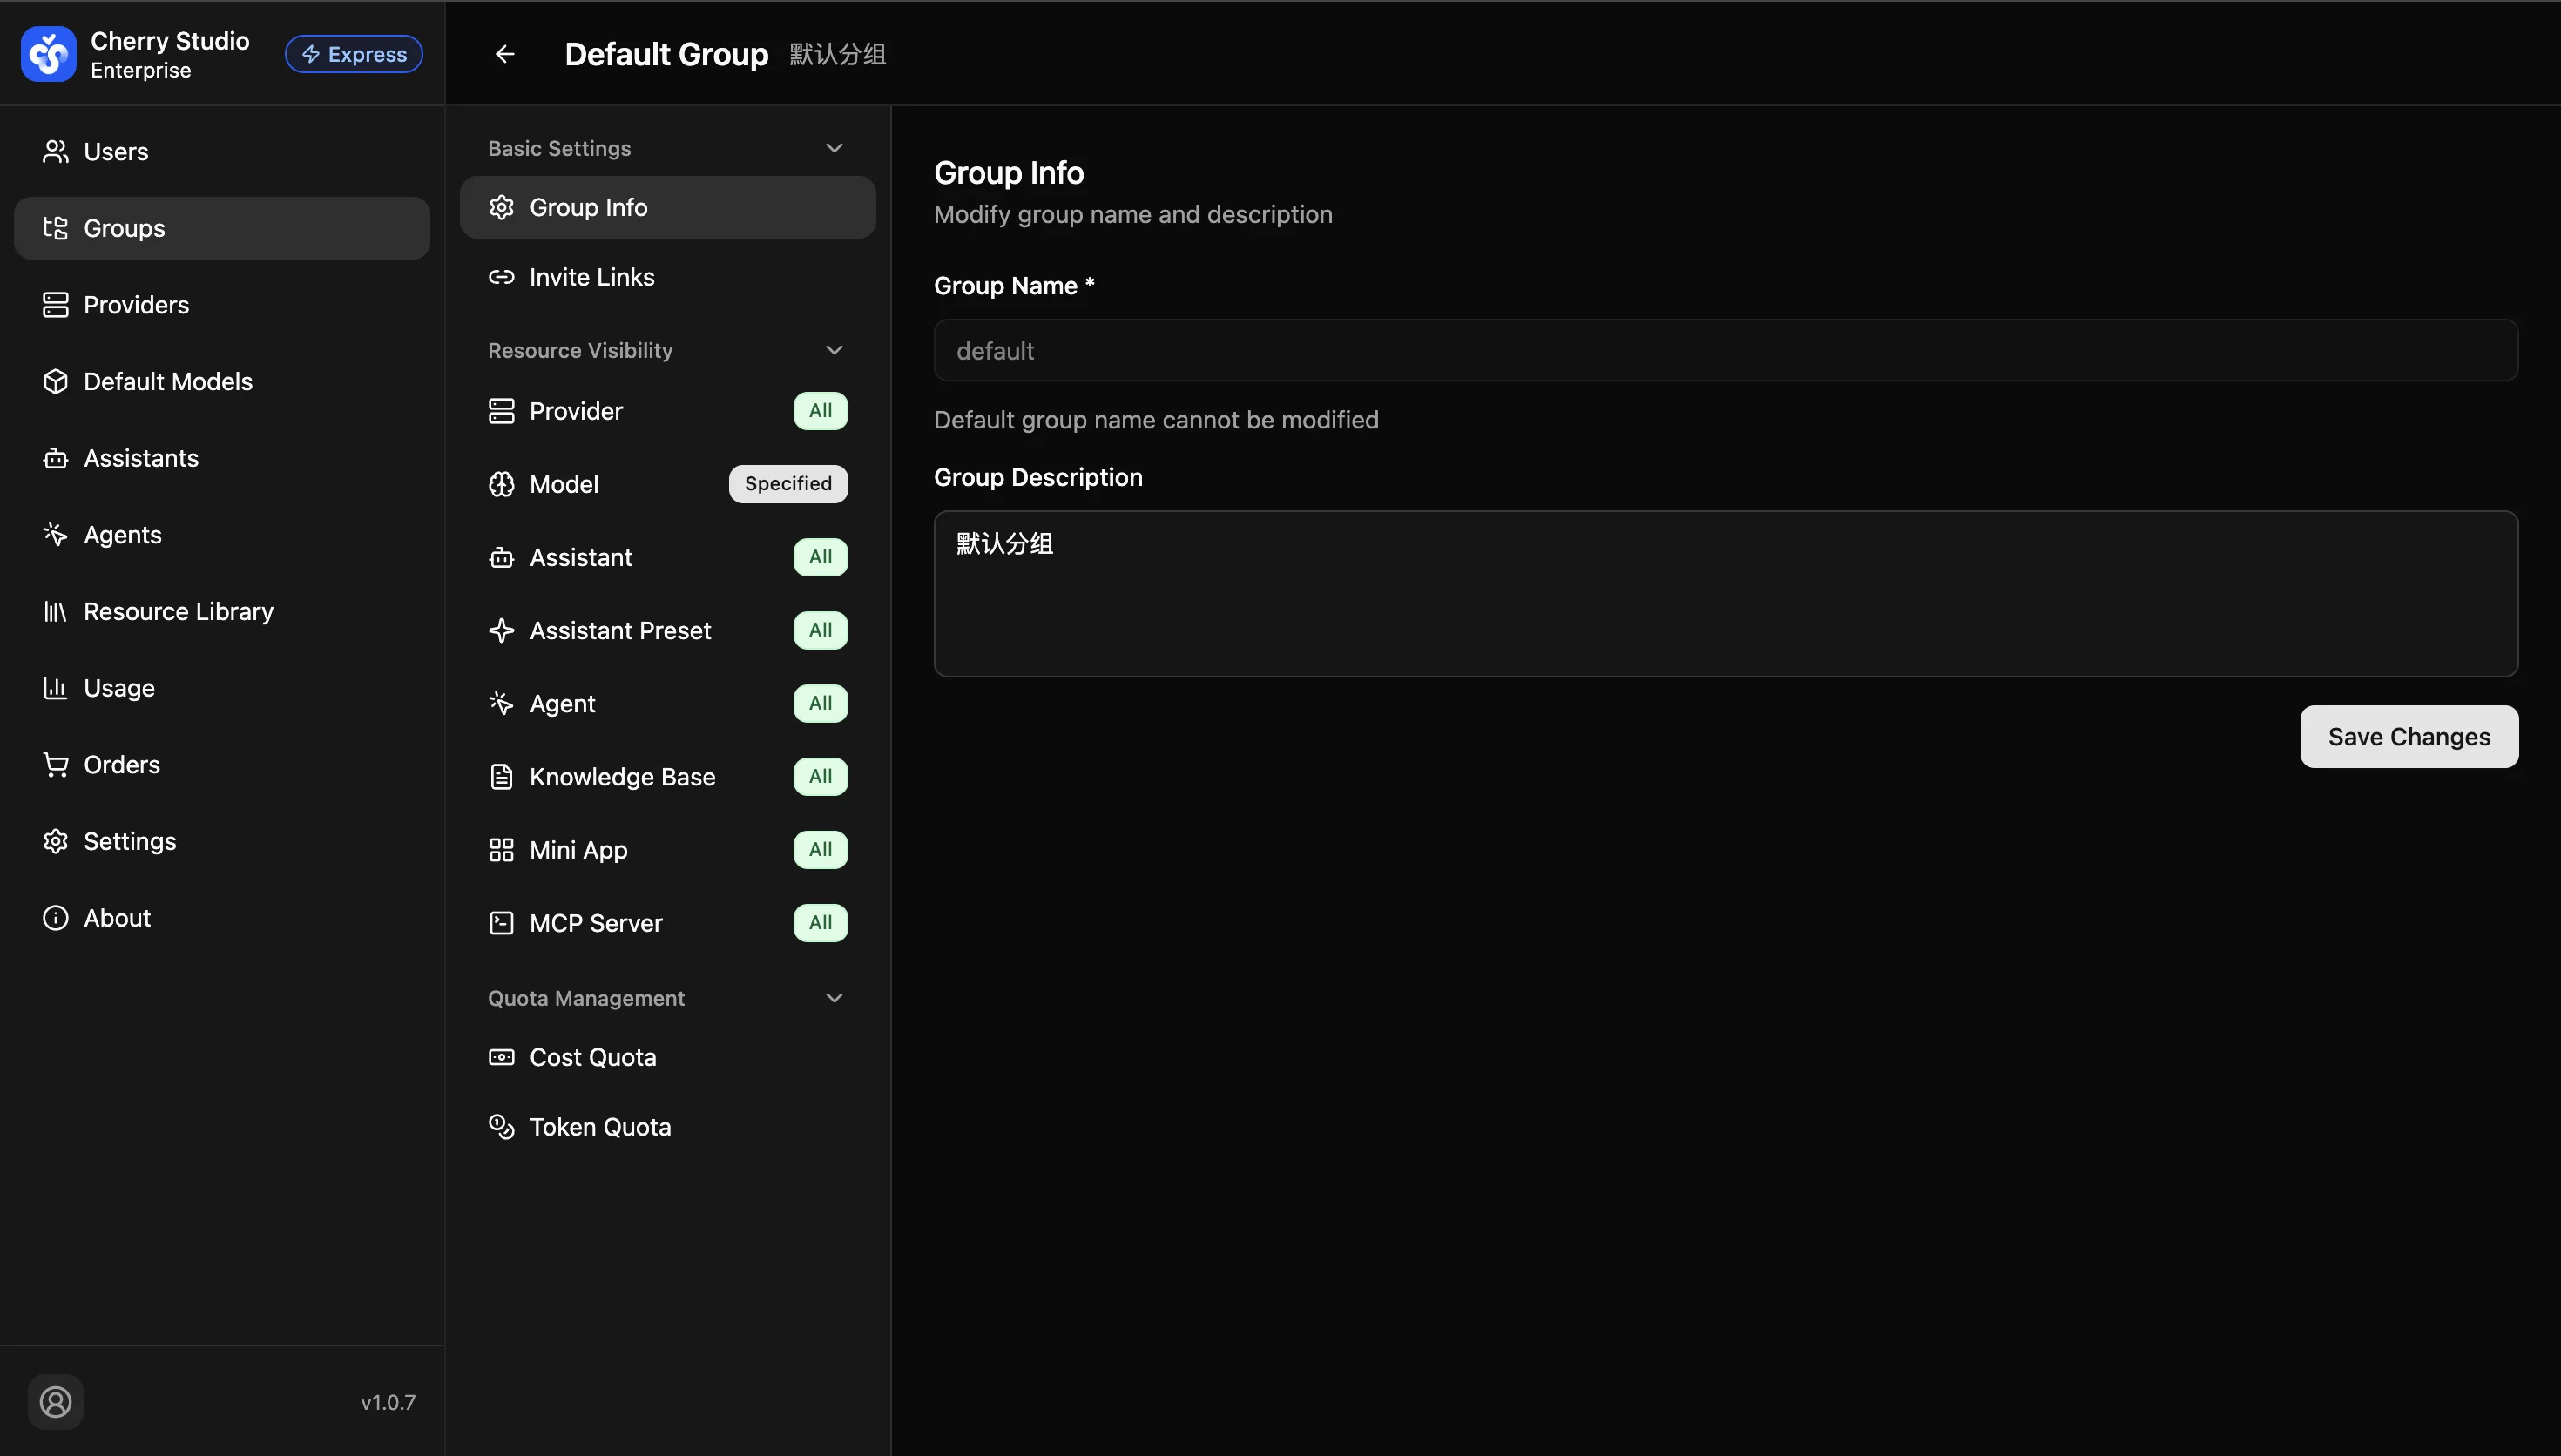
Effective immediately: Group changes (like adding model permissions) usually take effect in real time. Users only need to refresh or re-login to see updates.
Delete a Group
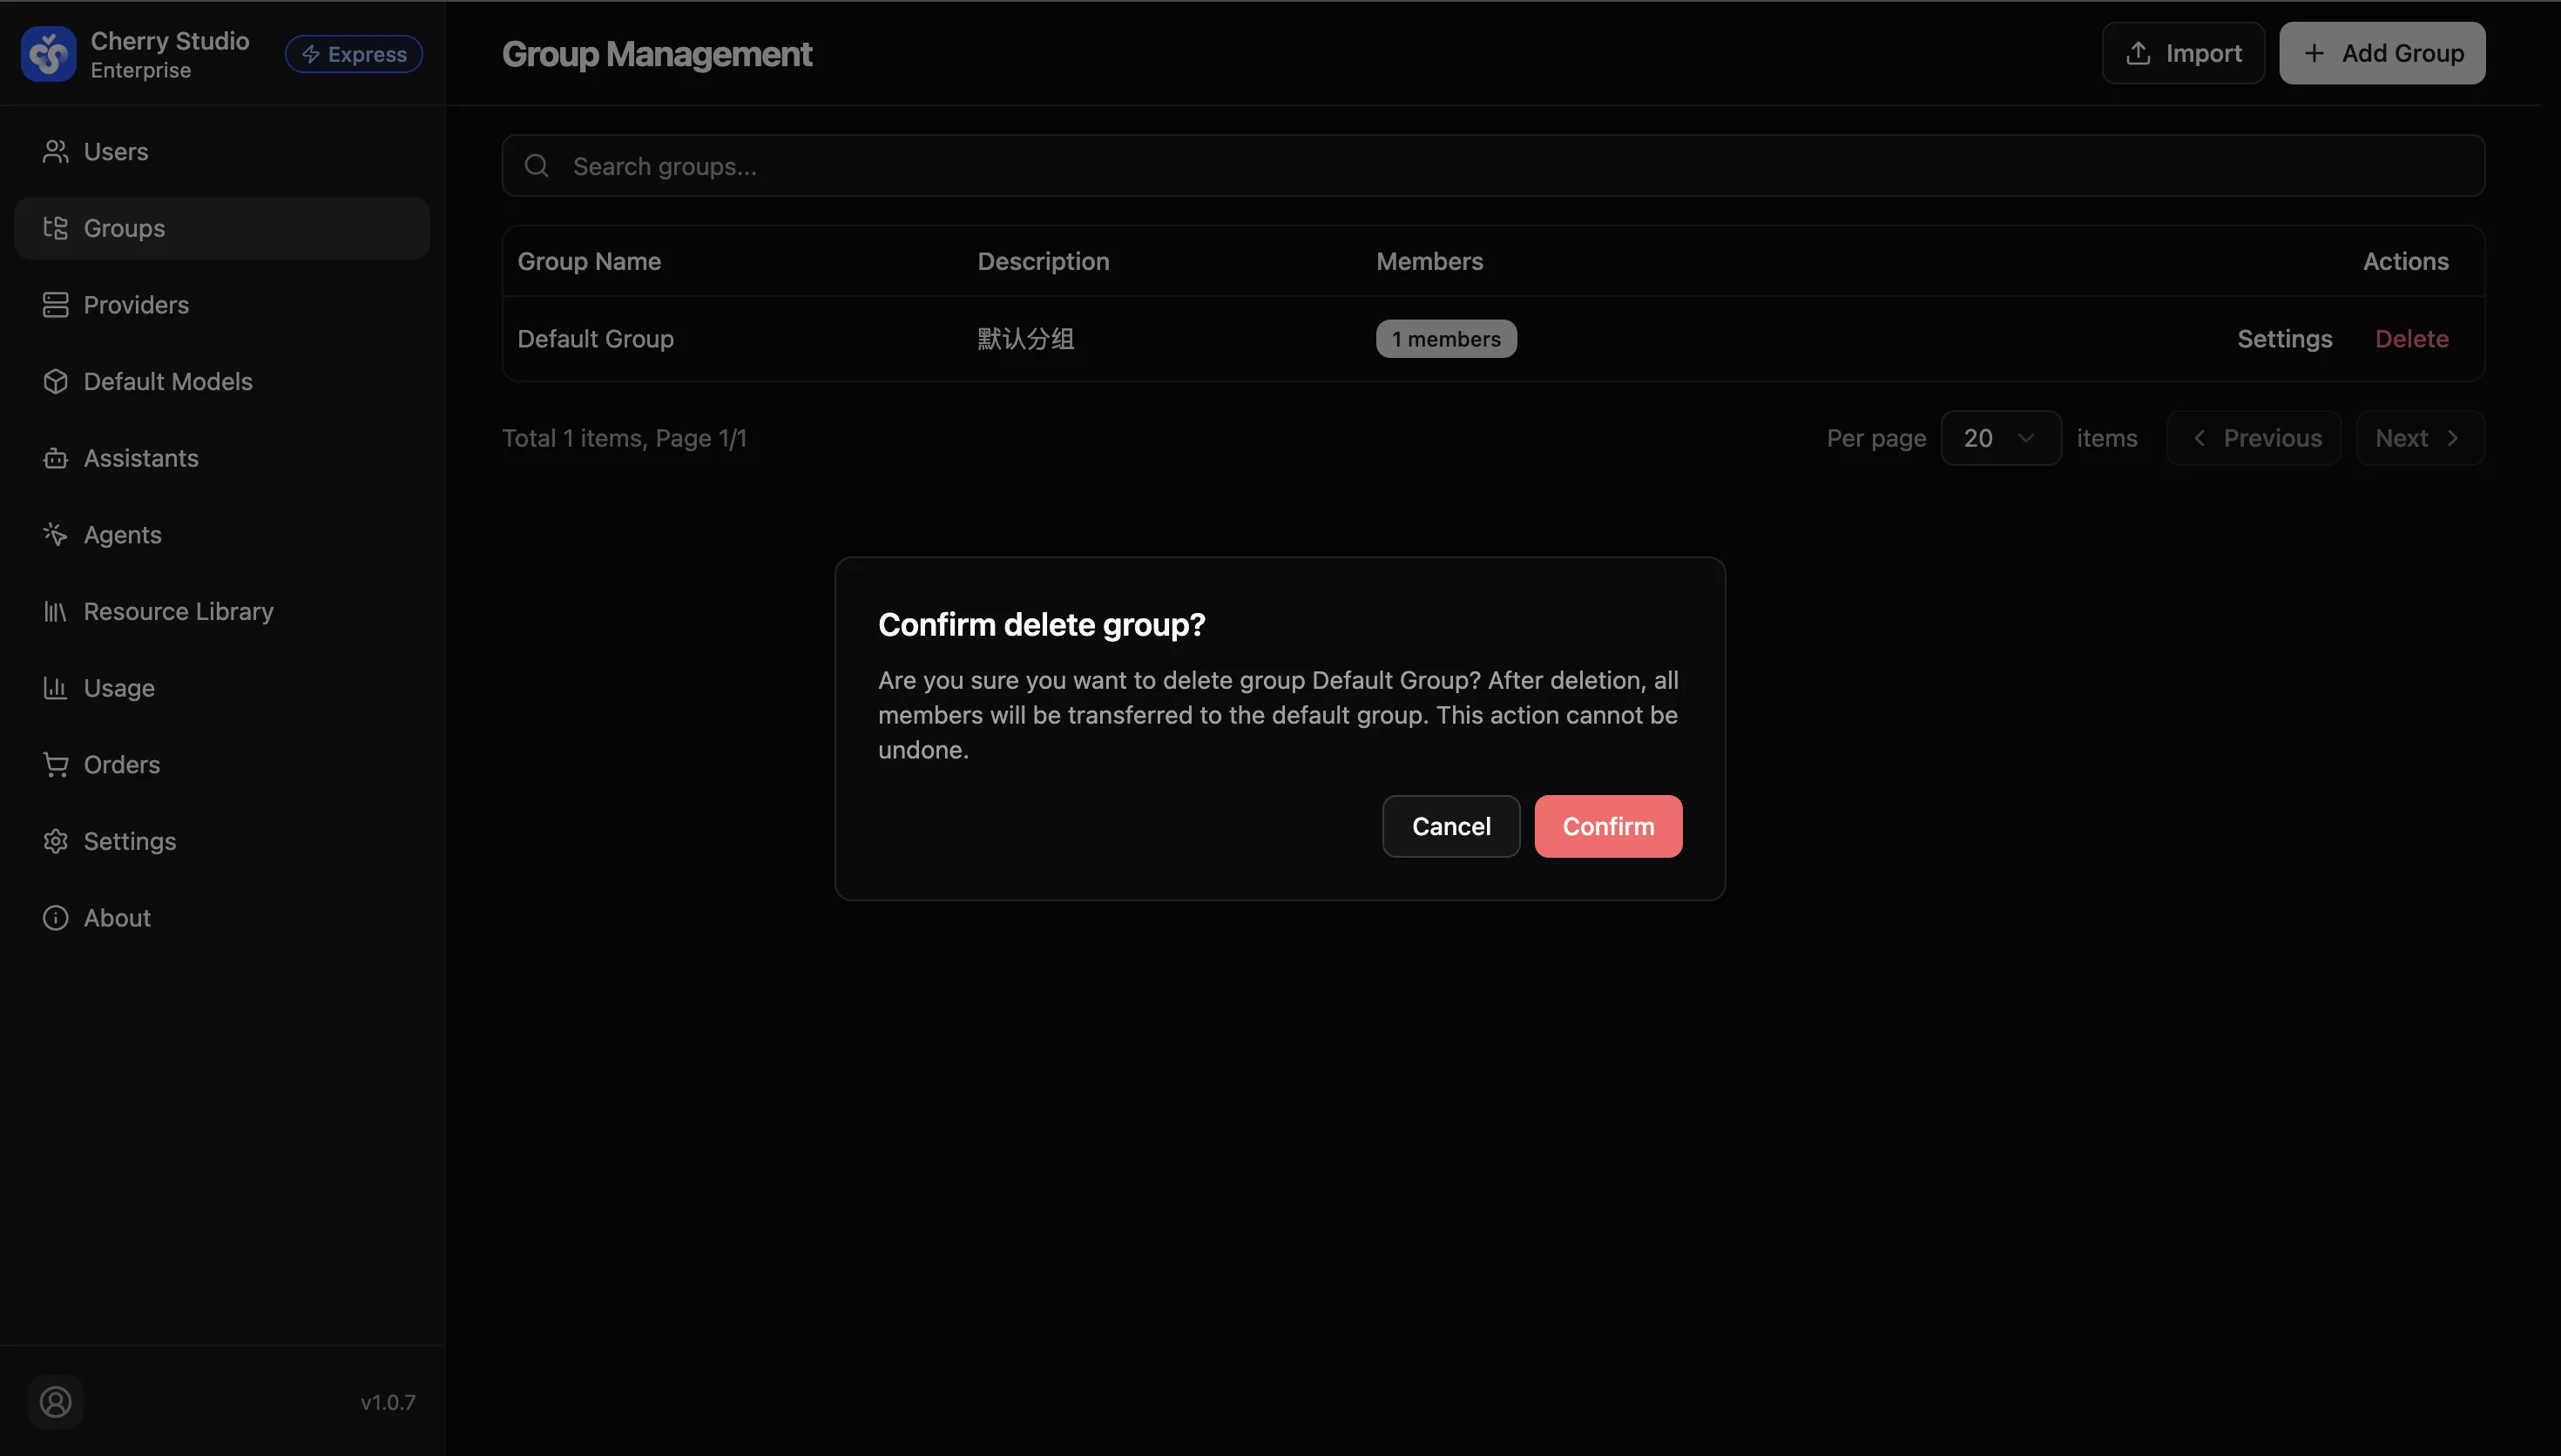
Dangerous operation warning
Before clicking Delete, make sure Members is 0.
- If users still belong to the group: Forcing deletion may move them to the default group, causing loss of resource access and workflow interruption.
- Recommended: First move group members to another group in User Management, then delete.