Invite Links
Create and manage invite links within group settings, controlling link expiration and usage limits for targeted member invitation by group.
Overview
You can manage invite links independently within each group. Admins can create dedicated invite links for different groups — invitees who register via the link will automatically join the corresponding group.
For the invitee registration flow, see Member Invitation.
Accessing Invite Link Management
- Go to the Group Management page.
- Click the Settings button on the target group to open the group edit page.
- Select Invite Links in the left sidebar.
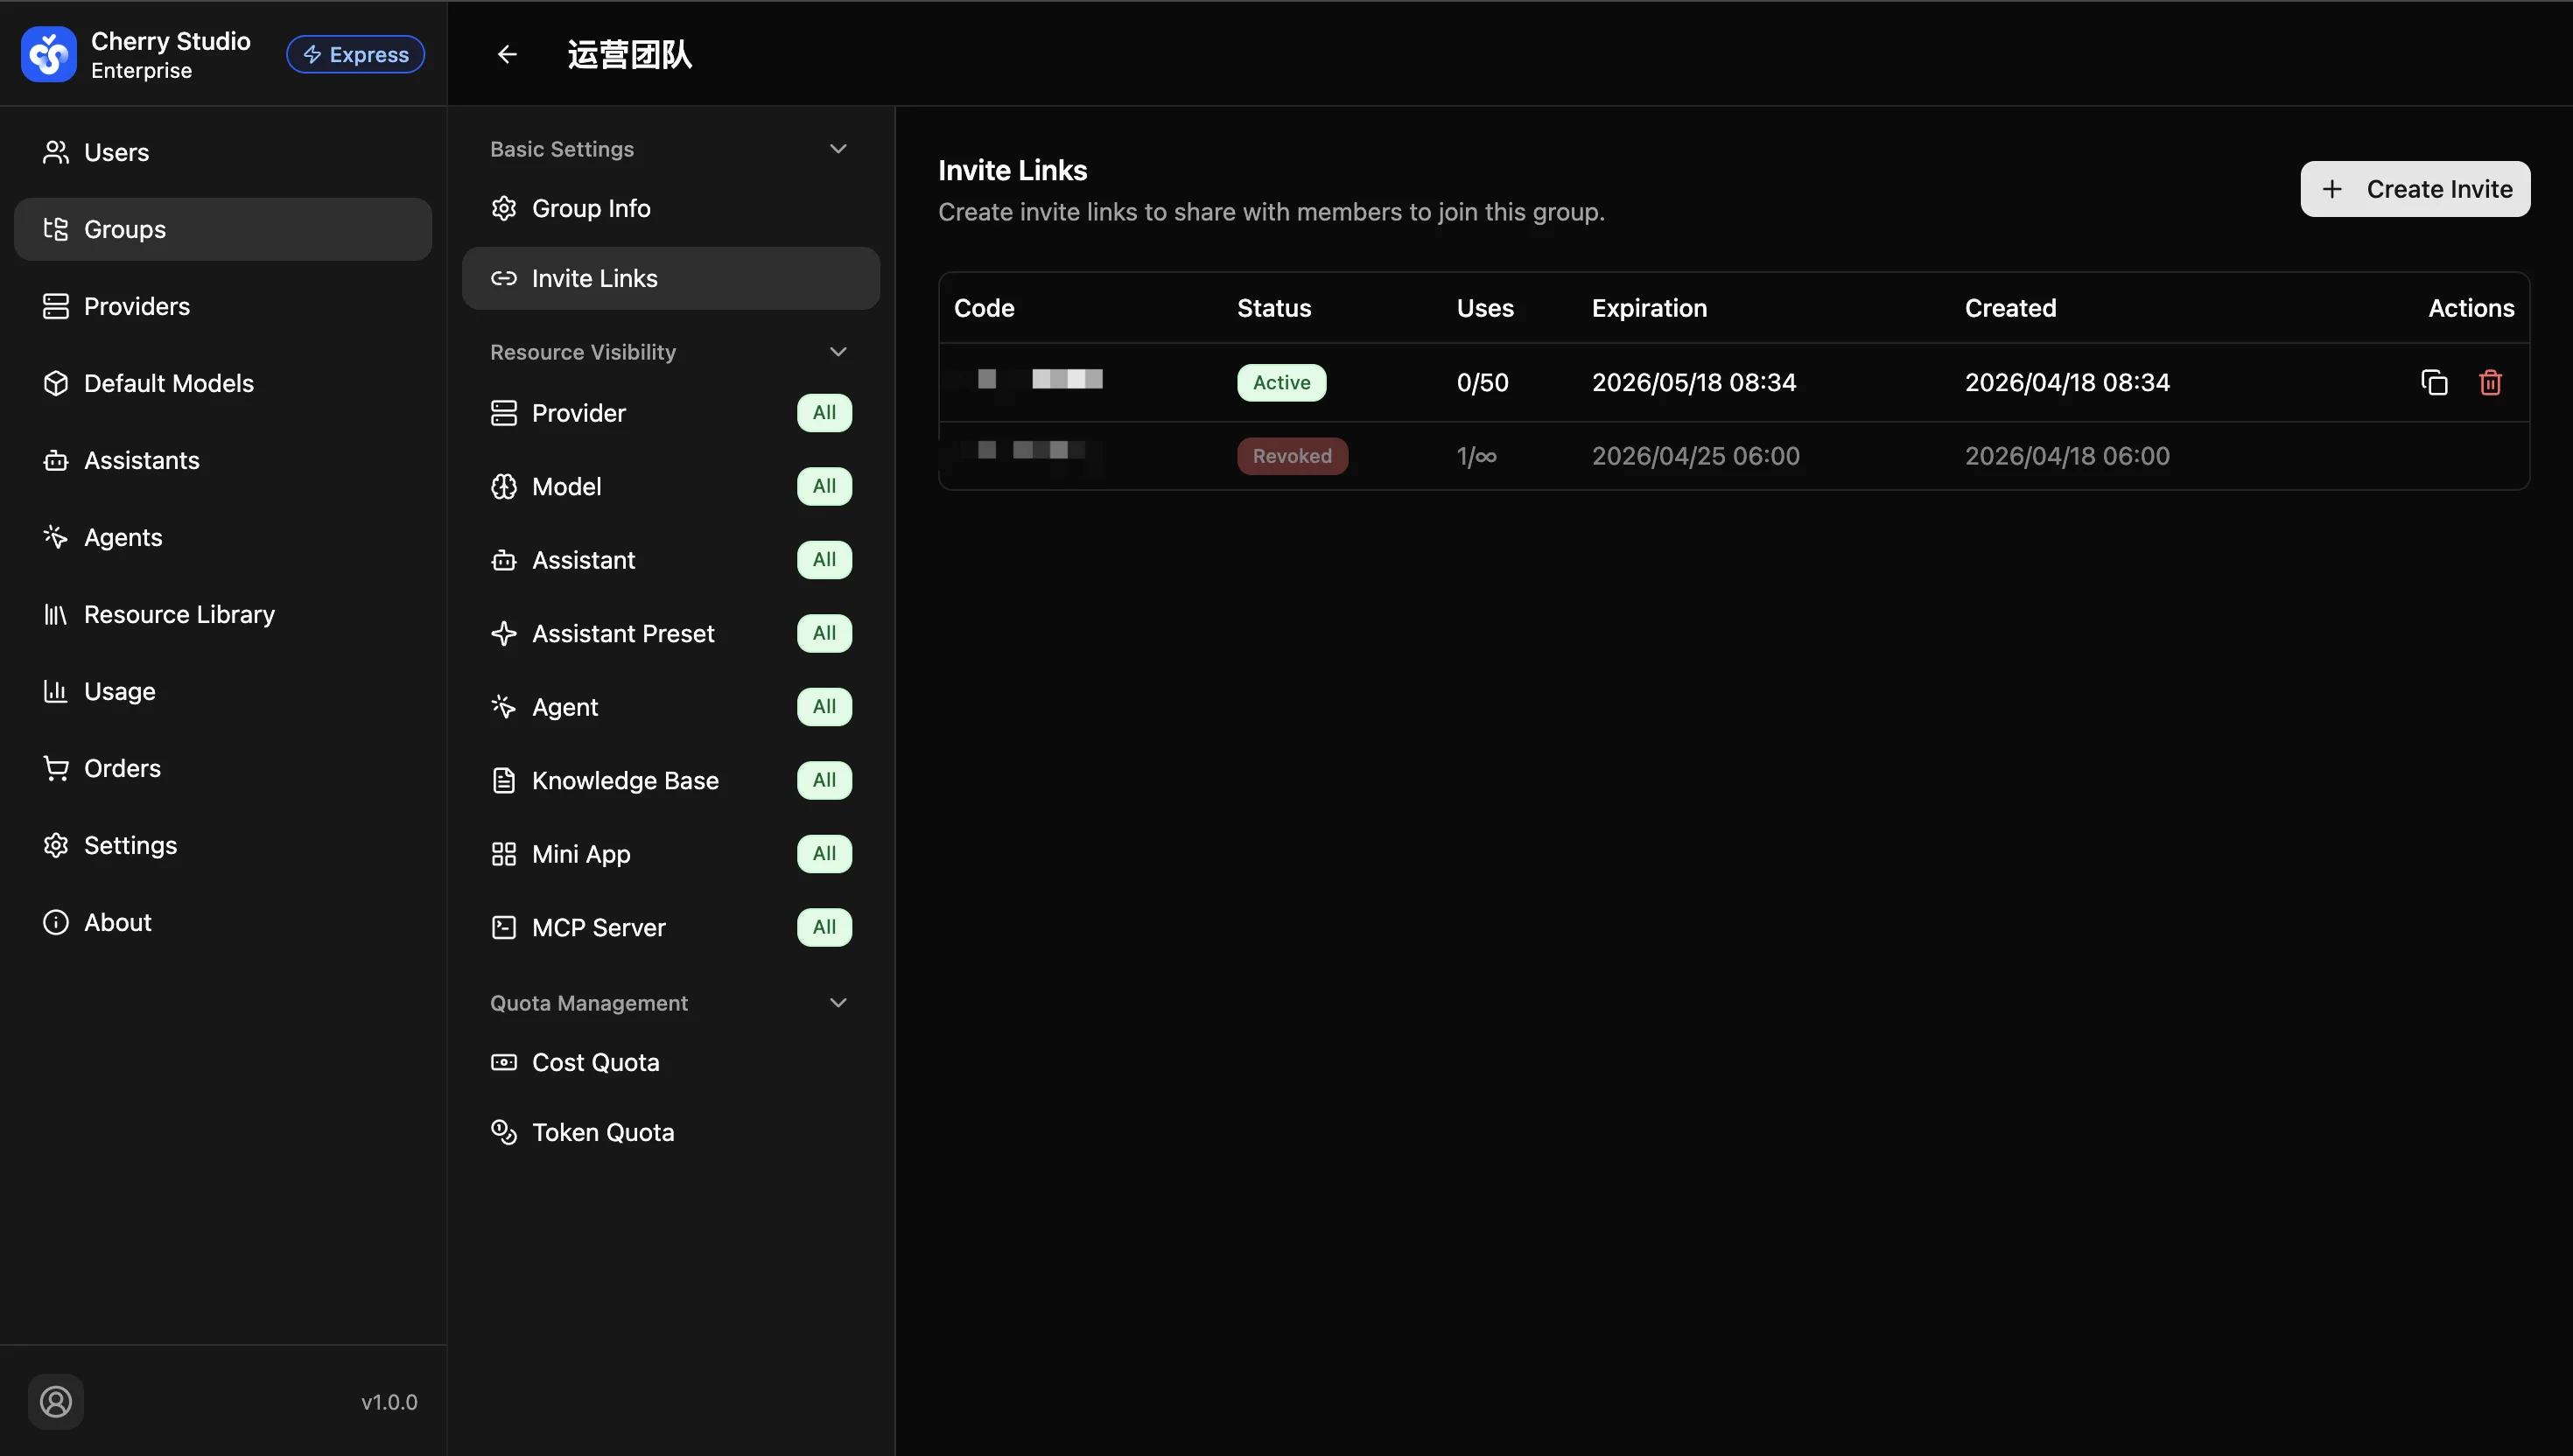
The invite link list displays the following:
| Field | Description |
|---|---|
| Code | Auto-generated unique invite identifier |
| Status | Active (green) or Revoked (red) |
| Uses | Used count / max uses (∞ means unlimited) |
| Expiration | Link expiration time; the link cannot be used after this date |
| Created | When the link was created |
| Actions | Copy link, revoke link |
Creating an Invite Link
- Click the + Create Invite button in the top-right corner.
- Configure the following parameters in the dialog:
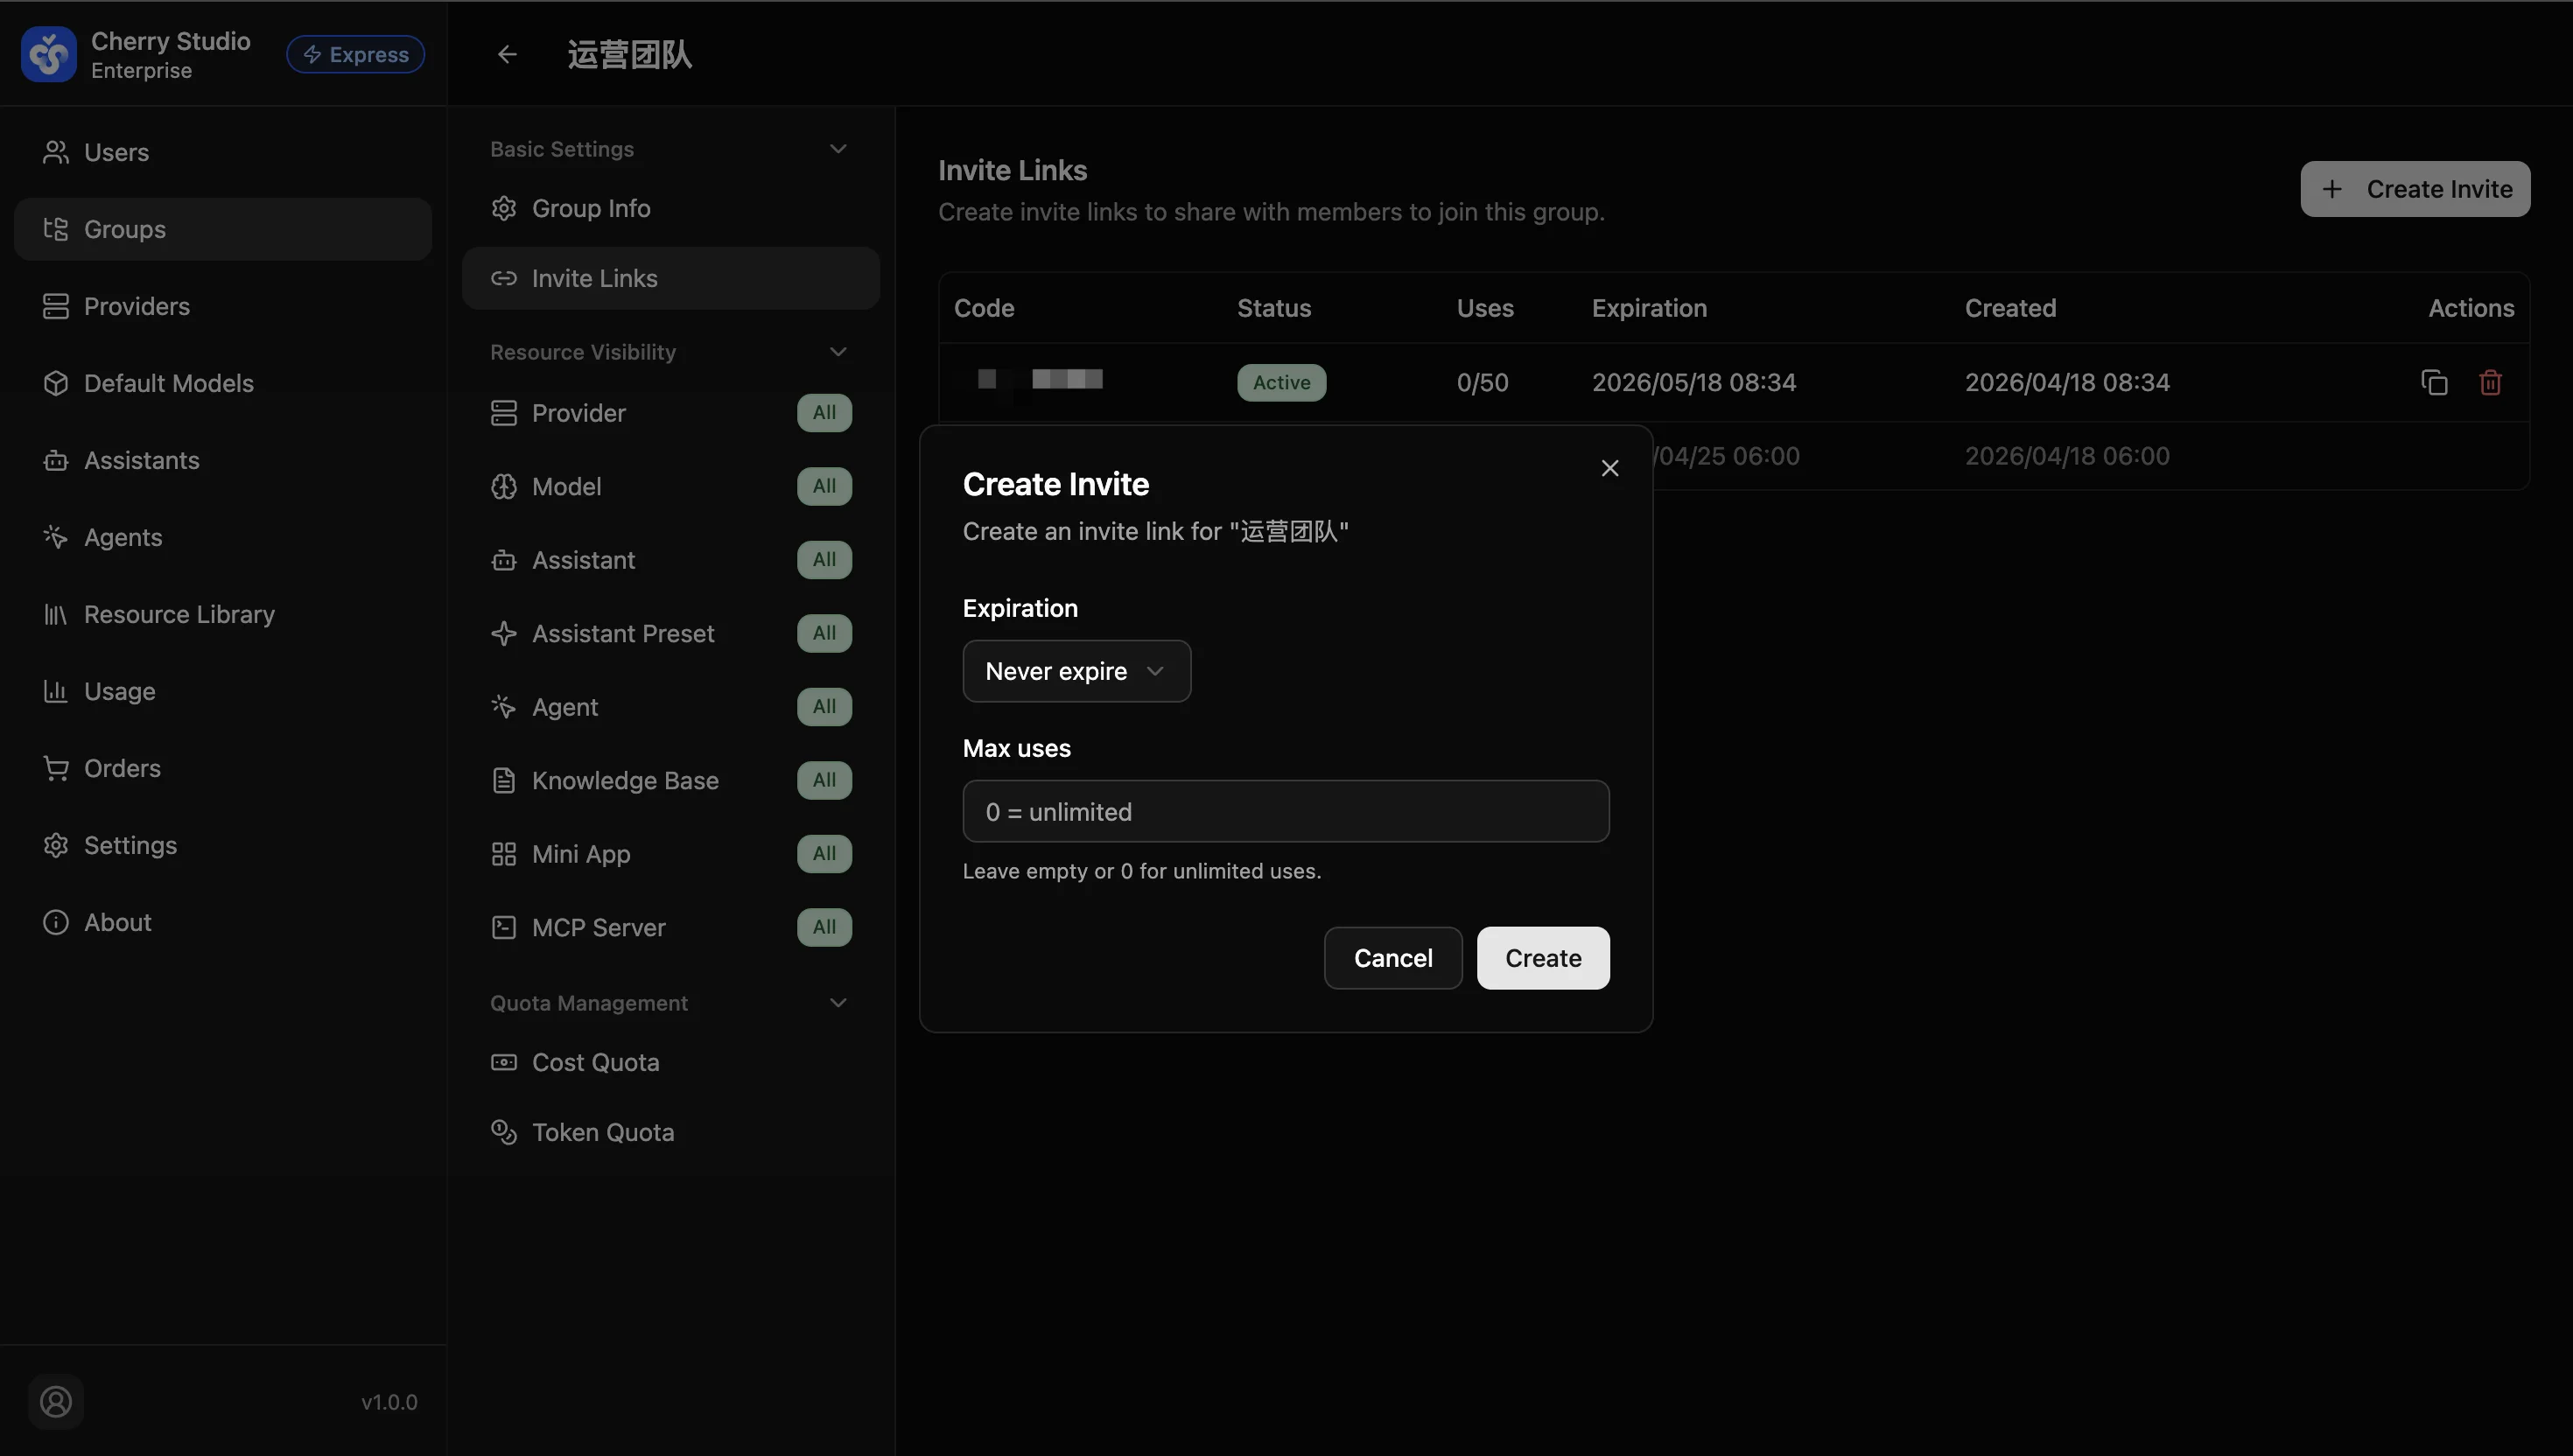
| Parameter | Description |
|---|---|
| Expiration | How long the invite link remains valid. Choose a preset duration or Never expire |
| Max uses | Maximum number of times the link can be used. Leave empty or enter 0 for unlimited |
- Click Create to finish.
Managing Existing Links
- Copy link: Click the copy icon in the Actions column to share the invite link with target members.
- Revoke link: Click the delete icon in the Actions column. Once revoked, the link status changes to "Revoked"; already-registered users are not affected.
Tip: Create separate invite links for different purposes (e.g., "new employee onboarding" and "external collaboration") to manage expiration and usage limits independently.